Table of Contents
Do you have an online business?
Are you facing monetary issues with respect to heavy shipment and delivery charges?
Is your store charging a standard rate at the checkout?
If yes, then you need to customize your WooCommerce store in a way that adds extra fees during the checkout process depending upon the given factor.
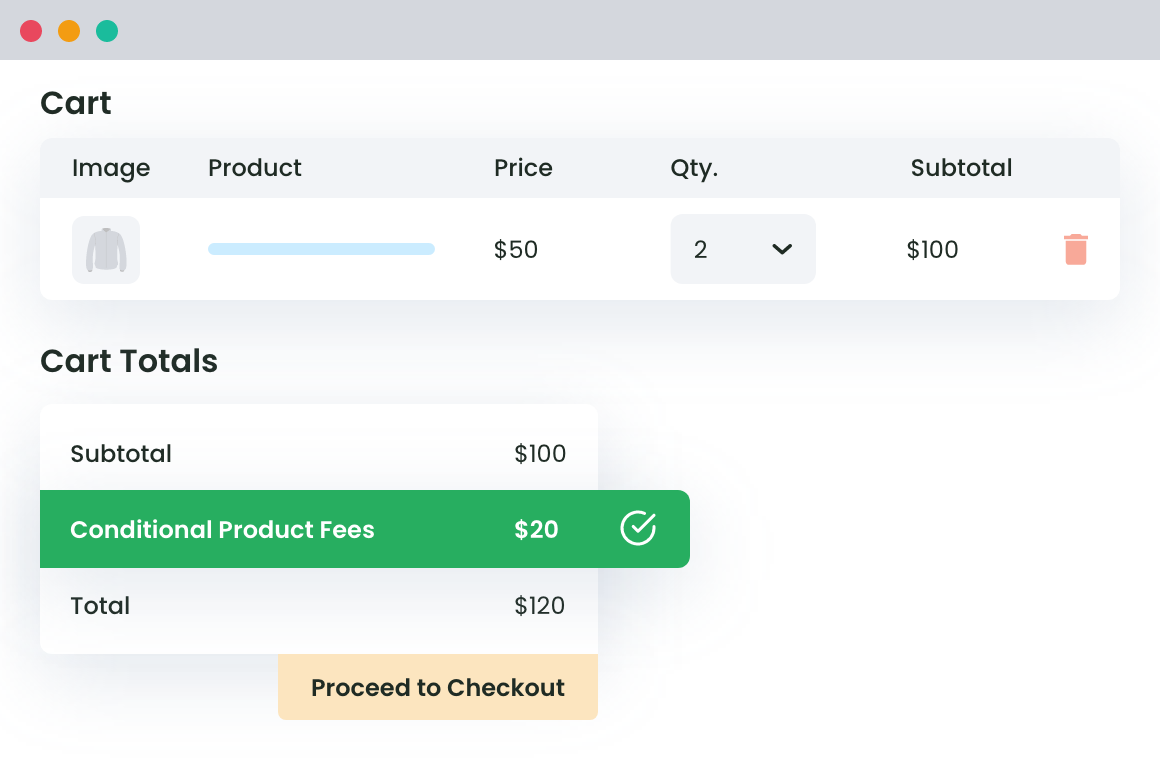
Often, it so happen that WooCommerce store owners need to charge the extra fees in the checkout page owing to an array of reasons. It could be anything between a heavy product to a premium customer, shipment to a different city, or a low cart-value situation. Either is the case, levying extra charges seems imperative. This is where the idea of WooCommerce Extra Fees Plugin pops in.
WooCommerce Extra Fees Plugin: How Does It Help?
Designed by DotStore, WooCommerce Extra Fees Plugin aims at customizing the store operations by adding rules to add extra fees during the checkout process. What this means is depending upon the cart or the product, you would now be able to levy additional charges in the final amount of the cart.
Wondering how to use the plugin?
Here is a detailed guide on how to see additional fees during the checkout process.
Prerequisites for Plugin Configuration
Before you start creating rules to configure the plugin, here are a few things that you would need to do.
- Download The Plugin: To begin with, you would first need to download the plugin.
- You can either download it from the website itself. Visit the page and purchase the plugin. Once done, you would have access to the file.
- Or, login to the WordPress dashboard using the credentials. Move to the plugin section and click on add new. Type the name of the plugin in the search bar and click on enter. Download the plugin here
- Install & Activate: After you have downloaded the plugin, click on the same to install it within your WooCommerce store. Once installed, activate the plugin to get started with the next process.
Configuring the Plugin: Standard Changes
Once the plugin has been successfully installed, we now see how to set the plugin and create your very first product fee.
As usual, login to the WordPress dashboard and move down to the plugin section. Here, click on WooCommerce Additional Fees Plugin and you will see a new screen flashing multiple fields. Move to the Add Product Fees and make the desired input.
WooCommerce Extra Fees
Make profits from every confirmed sale through smart, conditional fees.
14-day, no-questions-asked money-back guarantee.

Suppose you want to see a product fee rule that charges £17 extra. To create the above follow the steps given toggle.
- Status: Switch on the toggle to show that the current fee is activated.
- Product Fee Title: Here, give a unique name to the product fee, one that will help you identify which rule is for which condition. In our given example, we can simply state the title to be Product Fee.
- Select Fee Type: If you click on the drop-down, you will see there are two options available. Since we are adding a straight £17, we will select fixed. In case, you wish the amount charged to be a certain percentage of the final cart value, you can select the percentage-based option and enter the figure.
- Fees: Here, you can simply enter £17. In case, you want the value to increase every time a new product is added, you can select the Apply Per Additional Quantity. Once you click, you will see two more fields add up.
- Calculate Quantity Based On Depending upon whether you wish the value to increase per product or based on the cart value, select one.
- Fees Per Additional Quantity: Here, enter the amount that you wish to increase every time a new product is added or the cart quantity increases.
- Tooltip Description: Add a few details about the rule created
- Start Date: Enter the timeline from when you wish the rule to apply
- End Date: A final data when the rule lapses.
- Is Amount Taxable: Lastly, enter whether the said extra fee is subject to taxes or if it is tax-free.
Creating Rule-Based Conditions for Extra Fees
Moving on to the next step, we will now see how to create rules to assess and determine what amount to apply and when. We will outline a few cases so that you can have a better grasp of the plugin and its features.
Case One:
Free Shipping to Users that Buy Goods worth £250
Suppose that it is your end of season sale and in order to grab the attention of the buyers, you have come up with an offer where customers that purchase goods worth £250 are legible for free delivery for a month. Note, the amount is exclusive of taxes.

To do so, what you need to do is first fill in the details as in step two. Enter the product fee title to be free shipping. Under the product fees section, enter 0 as we are giving free shipping. Next, enter the start and end date as say starts in the month of June and ends on the first of July.
Next, we are now to create a rule to apply the above. Scroll down to the section that says Conditional Fee Rule. Here, click on add row.
You will see a new row added. In the first drop-down, scroll down to Cart Specific. Here, select Cart Subtotal (Before Discount). Next, select Equal to (=) and in the final box, enter 250. Finally, click on save to apply the settings.
Suppose that you wish to apply such a rule only for the buyers in Brazil. The WooCommerce Additional Fees Plugin gives you the ease to add more than one rule to the product fee.

To add a second rule here, click on the plus icon to add a second row. Here, under location-specific, select Country. Next, in the drop-down, click on equal to and then in the last field, enter the country name as Brazil.
Note: You can add more than one country in the same box if you want the rule to ply in two or three specific countries.
Case Two:
Free Shipping for Premium Customers or Subscribers
Imagine that your store has come up with a subscription offer where along with other benefits, subscribers get free shipping irrespective of the number of goods purchased from the store.
To do this, you again need to create a new product fee. Move to the Add New Product Fee. Enter the title as Free Shipping For Subscribers. Under the fee section, enter 0. In the data section, leave it as it is.
The fact that customers who have subscribed to the offer will be entitled to free delivery as long as they are the subscribers.

Now, move down to the Conditional Fee Rule section and click on add row. In the first drop-down, move down to User Specific and click on User Role. In the adjacent box, select equal too and finally in the last box, enter Subscriber.
Click on save settings to apply the changes.

In the given case, we can also have multiple rules. Say, you want to provide free shipping to subscribers only when the cart value exceeds a minimum amount (Say £150). To add this rule, follow all of the above-mentioned steps. In addition to that, we will create a second rule.
After you have added the User Role, click on add row. Doing this, a new row pops up.
Click on the first box and select Cart Subtotal (Before Discount). Now, select Equal to (=) and in the final box, enter £150. Finally, click on save to apply the settings.
With this, you can now provide free shipping to subscribers when they purchase goods of value £150 or more.
Case Three:
Apply £10 for Customers in Brazil->Santa Catarina
Consider a situation where you noticed that there aren’t many orders placed from Brazil and particularly in the Santa Catarina state. Sending one order means extra expenses from your end. While you have been giving your buyers free shipping but since you have now realized that this is causing immense loss, you have come up with a notion that customers from Santa Catarina would have to pay £10 as the shipping fee.
To create this rule, we first move to the Add Product Fee tab. Under the Product Fee Title, enter the shipping fee for Santa Catarina buyers. Enter the fee to be £10 and then move down to the create rule section.
Add a new row by clicking on the plus icon. In the drop-down, scroll down to select State. Click on equal to and then in the next box, enter Brazil-> Santa Catarina. In case, you want the rule to apply for all over Brazil, you can simply select a country from the drop-down and then enter Brazil. Or, if you want the rule to be applicable for two or more states, you can add the name just beside Santa Catarina.
Click on save settings to implement the changes.
Conclusion
It is anyway essential for most of the online stores to charge extra money from the customers. From payment gateway fee to wrapping/last-mile delivery to remote areas or anything – the reason could be any. Your WooCommerce developer may charge very high to build this feature in your website. Hence, pick WooCommerce Extra Fees Plugin and get started in no time. It will cause nominal incurring for you.
WooCommerce Extra Fees
Make profits from every confirmed sale through smart, conditional fees.
14-day, no-questions-asked money-back guarantee.


