Table of Contents
WooCommerce is one of the most popular e-commerce
development solutions. If you are setting up your online store with it, you
have made the right decision. The solution gives online store owners full
flexibility to extend their business later on.
If using this WordPress aid, you must have to learn how to charge the payment gateway based fee in WooCommerce in order to start payments online. So, in this article, we are going to teach you this. But first, let us tell you why you need to do this. If you want to learn the procedure as convinced with the fact that payment gateway fees should be charged, you can skip one section and start following the how-to part of the article.
Why do you need to Charge Payment Gateway Based Fees?
Payment Gateway Integration is essential for any eCommerce business. After all, it is the functionality that allows buyers to make payments online. However, the concern for new entrants in online selling businesses is –
These payment gateways have dynamic fees to be paid. It means, whenever a customer buys something from your store using a particular payment gateway, a small fraction of money will go to the gateway service provider.
Now, the problem is that paying subscription-based or one-time fee is a straight-forward task, but this business model makes it tough for the business owners to determine the money which will be incurred on it. Hence, the best way is to charge this amount from customers directly, instead of adding this cost in the product price.
And if not done, you will have to bear losses.
So, how will you do that?
You will need to deploy a system to charge payment gateway based fee in WooCommerce.
How to Charge Payment Gateway Based Fee in WooCommerce?
You can either get custom code/plugin to extend this feature of charging payment gateway based fee in WooCommerce store or download a well-known plugin to make this happen.
We would suggest you choose the latter path because good plugins generally come with more than one feature and are maintained regularly by experts. It won’t depreciate when WordPress will move the next versions.
WooCommerce Conditional Product Fees for Checkout Plugin is the best aid to enable your eCommerce store to charge payment gateway based fees.
WooCommerce Extra Fees
Make profits from every confirmed sale through smart, conditional fees.
14-day, no-questions-asked money-back guarantee.

Step 1 – Setup and Open Plugin Dashboard
Download this plugin and install it on your WooCommerce store. Search for the plugin’s name in the left sidebar of your admin dashboard and click on it to open the plugin dashboard.
Alternatively, you can use this demo setup for now and later install the plugin when fully convinced about its utility for your store. In this case, click on ‘View Admin’ to reach the plugin dashboard.
Step 2 – Fill Fee Configuration Form
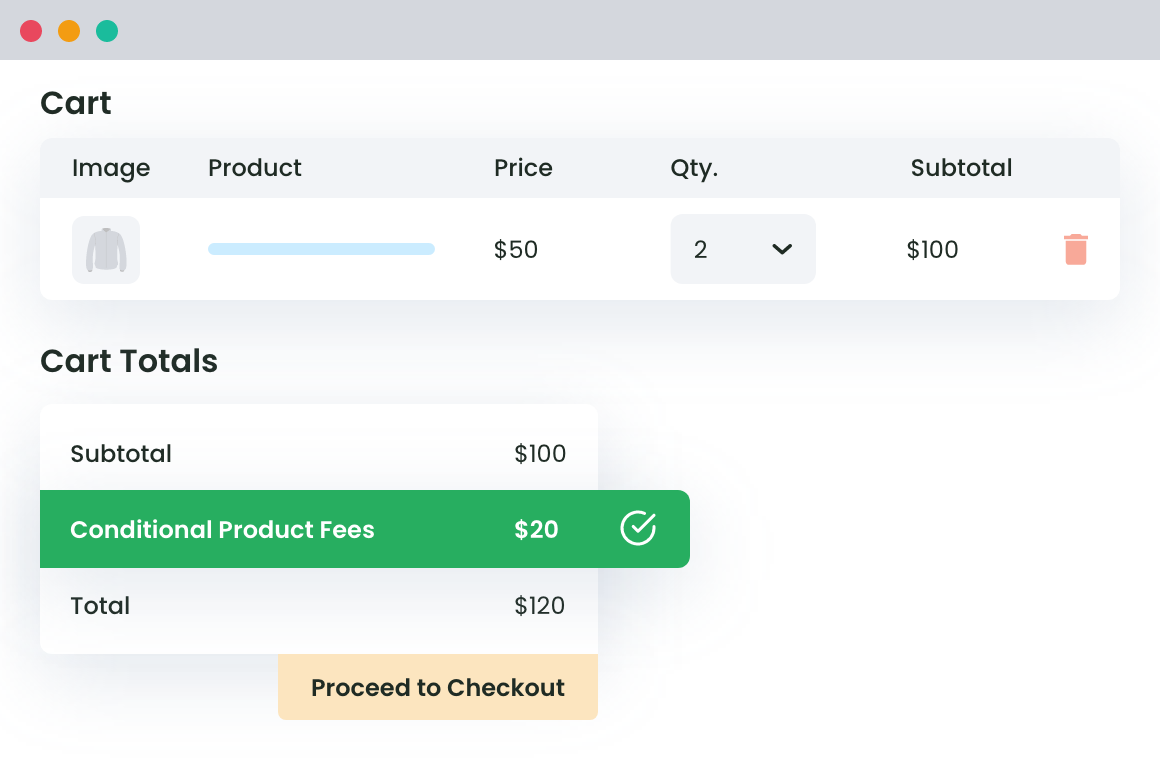
Click on ‘Add Product Fee’ from the main plugin page within your WordPress dashboard. A product fee is an extra fee which you could apply on a product or on a whole cart. It is charged above the total product/cart amount. This plugin also facilitates you to decide if you want to charge taxes on an additional fee or not.
Now, a new web page must have appeared. This page should have 2 forms. One is fee configuration form while other is Conditional Fee Rules form. In the first form, you have to add all the basic details about your plugin while, in the second form, you’ll determine the scope of your method, i.e. when should the added payment gateway based fee be applied.
Fee Configuration Form will look like this –

In this form, leave the status of method ‘enabled’ (Blue colored) for now. When you don’t need the method for a certain time period, you can disable the toggle button.
Thereafter, add an understandable name for the Product Fee Title field. This name will be visible on the cart page to the buyer. So, use a name which clears why you have added this fee. For example – ‘Payment Gateway Based Fee’ is a nice fee name for this case.
For the dropdown dedicated to ‘Fee Type’, select an option as per these 2 points –
- If your payment gateway carrier charges a fee in fixed values like $0.5, $2, etc. per transaction, select the fee type as ‘Fixed’ and add the fee in the next field.
- If your payment gateway carrier charges a fee in a fractional amount, such as 2% of the transaction or 1.5% of the transaction, select the fee type as ‘Variable’ and fill the percentage value in digits.
Now, select start and end dates for your Product Fee Method if required.
In the end, fill in the form if this method will be taxable or not.
Step 3 – Add Payment Gateway Based Fee Rule (and other rules) to your method
Now, come to the Conditional Fee Rule section, which is just below the fee configuration form in the currently open web page. You may add as many rules in this section as you want. For adding a new rule, you will have to click on ‘+ Add Row’ each time.
Each Rule has 3 sections –
- Left-side dropdown bar, which contains a list of elements. Using this plugin, you can add extra fee related to multiple factors like product weight, product quantity, country, state, zip code, and many more.
- A dropdown list in center, which has conditional operators like equals, not equals, less than, greater than, Less than or equal to and Greater than or Equals to listed in it.
- A text field or dynamic search bar, through which, you can fill the values which you expect to be the part of your rule.
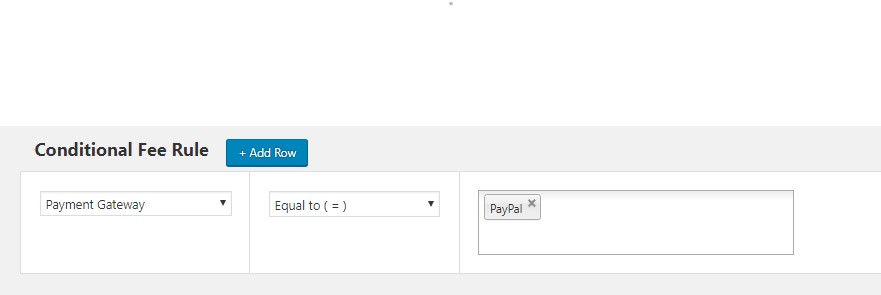
To add payment gateway related fee, we will choose ‘Payment Gateway’ from the first dropdown and relevant conditional operator for your rule. We are going to add an extra fee for PayPal, hence, have selected ‘Equals to’ and ‘PayPal’ in the text fields.
The rule will look like this –

After adding this rule, think of more restrictions you want to apply on your method.
Do you want to apply this rule when cart subtotal crossed $350?
Well, add another rule, as depicted here –

You can add as many rules as you want, in a similar fashion.
Step 4 – Save and check.
Finally, save the settings and exit the plugin dashboard. Now, go to your store and try to order some product while keeping the conditions (for payment gateway) same as you’d set in your Product Fee rule. If an extra fee related to the said payment gateway is applied automatically to your cart, your method is working properly.
In case it does not work fine for you, re-read the parts of this article and figure out what mistakes have you made. Or, you can also reach out to us in order to understand what’s wrong with your setup. Not just this, you can explore more about the plugin here and ask its developers to customize it for your needs as it does a lot more than just enabling payment gateway based extra fees.
WooCommerce Extra Fees
Make profits from every confirmed sale through smart, conditional fees.
14-day, no-questions-asked money-back guarantee.


